There are various methods and tools to manage your dotfiles on your Linux/Unix system. But we will discuss only two of them:
GNU StowA Beginner friendly toolln -sSimple but effective without using any 3rd Party tool
GNU Stow
Installation
Let’s install stow first, on Fedora:
sudo dnf in stow
On Ubuntu and based distros:
sudo apt install stow
On Archlinux:
sudo pacman -S stow
Usage
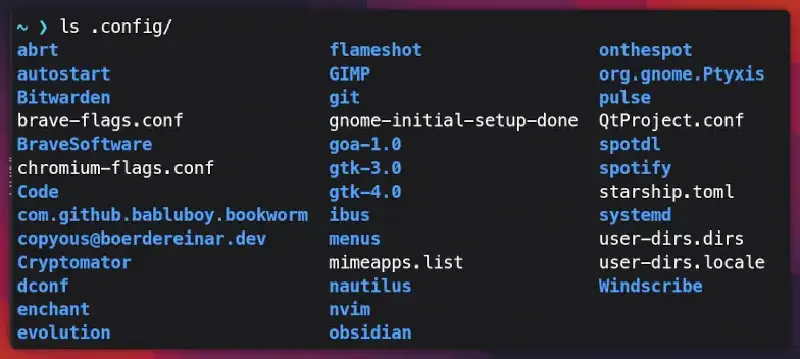
Make dotfiles directory in the $HOME directory:
mkdir $HOME/mydots
The mydots directory will be created in your $HOME.
Initialize the empty git repository:
git init
Now mydots will be initialized as a git repository. You can use git, to version control your dotfiles.
Basic Directory Structure
You can keep your dotfiles repo inside your git/github repos directory too, later I’ll explain how to do that, instead of keeping your dotfiles in the $HOME directory.
To save alacritty config inside the mydots directory, you need to make sure:
- Name the parent directory as
alacritty - As
alacrittyconfig resides in the~/.config/alacrittydir, we need to make two directories inside the parentalacrittydirectory, which are.configand inside italacritty(That’s howstowknows where to put the configs for each application)
mkdir -p alacritty/.config/alacritty
- The
-pflag makes sure no error if existing, make parent directories as needed.
The ~/mydots/alacritty/.config/alacritty directory will be created. My mydots directory was completely empty, so -p flag made all the directories in one go.

Copy your alacritty config from $HOME/.config/alacritty directory to mydots repo.
cp $HOME/.config/alacritty/alacritty.toml $HOME/mydots/alacritty/.config/alacritty/
Now you have alacritty.toml config inside proper place in mydots repo.

Let symbolic link your mydots repo alacritty config to your $HOME config directory.
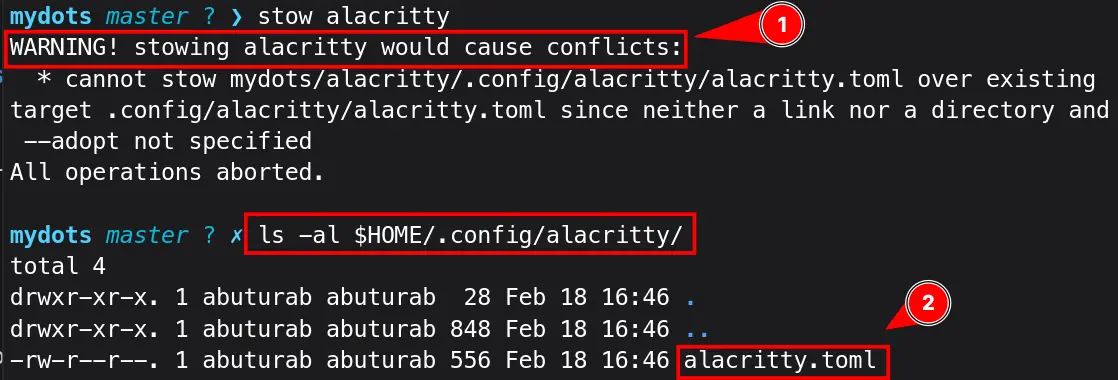
stow alacritty
It didn’t work, isn’t it!
-
It showed error, as the
alacritty.tomlalready exits in the$HOME/.config/alacritty/alacritty.toml. -
When we checked our
.configdirectory, it shows thealacritty.tomlas a normal file, not symlinked anywhere.
One option is to delete the alacritty.toml file as this:
rm $HOME/.config/alacritty/alacritty.toml
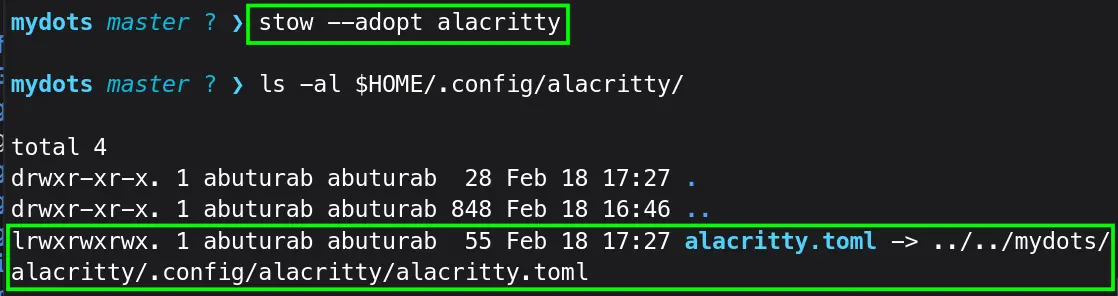
But stow offers a way to tackle this:
stow --adopt alacritty
- The
--adoptflag stows the already existing plane file which is not owned by any existing stow package - It replaces your ~/.config/alacritty` directory with the symlink to the stow directory.
When you reinstall, or $HOME/.config/alacritty/ directory doesn’t exist, running stow alacritty will take care of creating a $HOME/.config/alacritty directory and symlinking the alacritty config directory to the stow directory.
Let’s understand stowing with another example of a config file present in $HOME directory.
I have a .profile config in my $HOME directory. To stow, I need a profile directory in my mydots repo, and inside it, only .profile config file resides.
First let’s create a directory inside mydots repo:
mkdir -p profile
After this, let’s move/copy the .profile file inside profile’s directory.
mv $HOME/.profile $HOME/mydots/profile/
Then run:
stow profile #--adopt if you decide to copy instead of move
It will stow the .profile to $HOME/.profile

|
|
statusTo see untracked/modified filesadd .Stage all the untracked/modified files for commitcommit -mCreate a new commit containing current staged contents of the REPO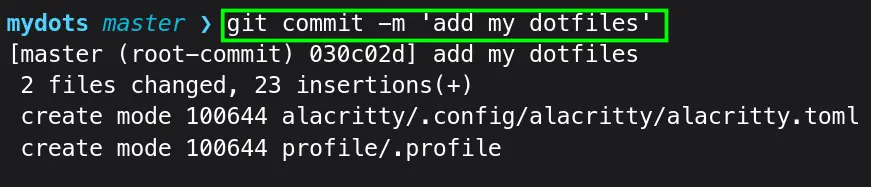
You can now upload mydots REPO to your GitHub/GitLab.(Out of the scope of this blog)
Advanced Directory Structure
If you don’t want to follow the standard directory structure, stow offers advance flags to allow using your own directory structure.
In my opinion, deviating from standard stow directory structure, defeats the purpose of stow, you can use it, but why not use ln -s at this point if your only need is to manage dotfiles.
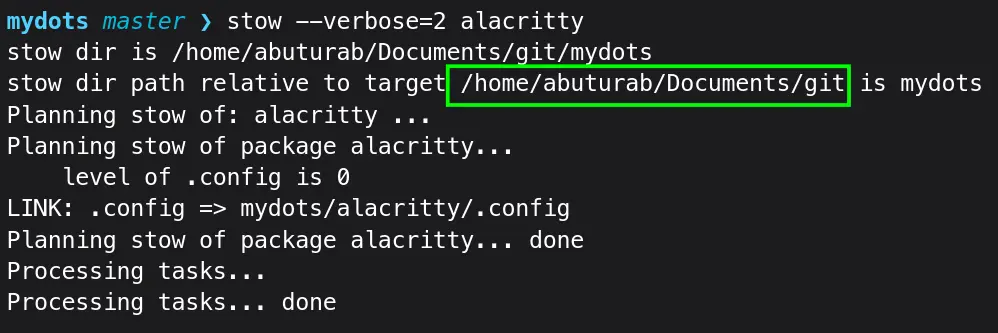
Let’s transfer mydots directory to my git directory:
mv $HOME/mydots $HOME/Documents/git/
Now run (from inside mydots DIR):
stow alacritty
The command was successful but no alacritty in the $HOME/.config.
Run again with:
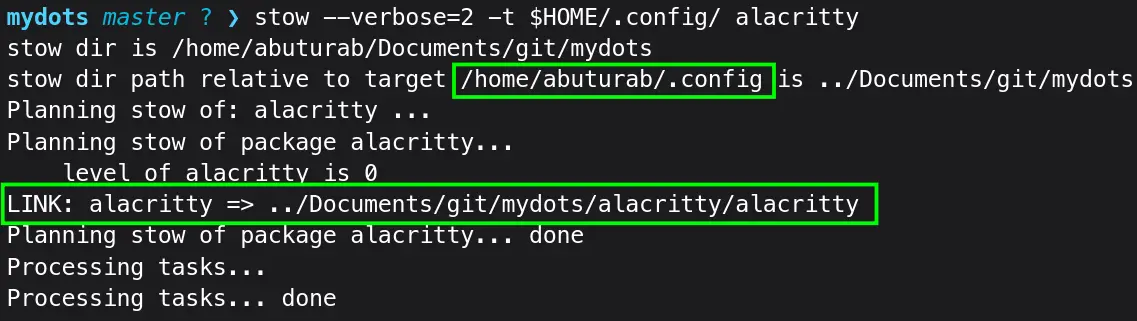
stow --verbose=2 alacritty
It was linked to $HOME/Documents/git directory. The stow command by default takes its parent DIR path as target.
First remove the redundant symlink:
stow -D alacritty
Let’s use the command:
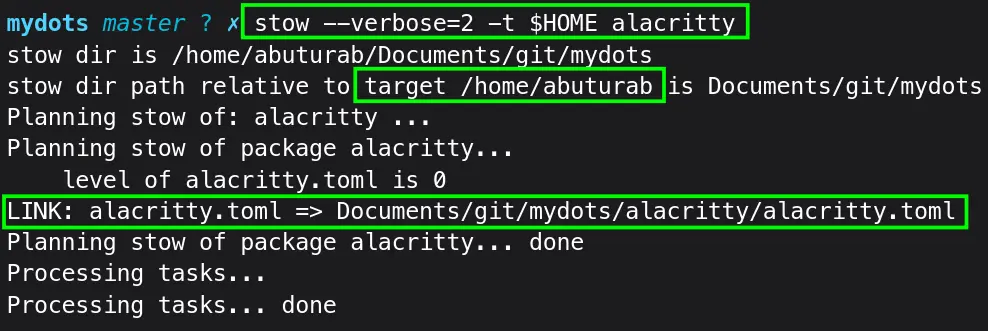
stow -t $HOME alacritty
-t DIR/--target=DIRSet the target directory to DIR instead of the parent of the stow directory
2nd example:
To link profile:
stow -t $HOME profile
But what if you also don’t like creating multiple directories inside your mydots repo for a single configuration file.
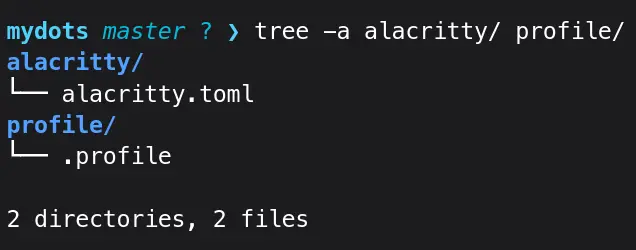
Let’s go one step further, move alacritty.toml to mydots/alacritty, and delete .config/alacritty inside the mydots/alacritty directory.
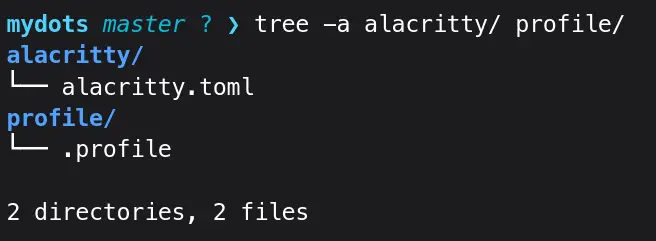 The
The alacritty directory contains only alacritty.toml file, no more .config/alacritty.
Now run:
stow -t $HOME alacritty
It will save the alacritty.toml file in the $HOME directory instead of $HOME/.config/alacritty.
To fix this:
stow -t $HOME/.config/alacritty alacritty
- The directory
$HOME/.config/alacrittyshould be created first, as stow will not handle it this way.
To avoid manually creating a directory, use this directory structure:
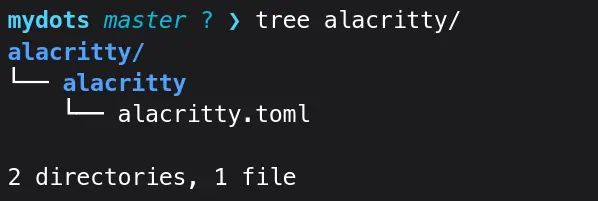 With
With alacritty/alacritty/alacritty.toml directory structure, you will need only this command:
stow -t $HOME/.config alacritty
It will link the alacritty directory normally to $HOME/.config.
You have to use one or the other directories structure for configuration files, you cannot just put them directly inside mydots directory when using stow.
As you can see, advanced method got quickly out of hand and only suitable for Pro users. If you already a Pro user why not use ln -s, available on the system. But, it’s your choice at the end of the day.
Useful Commands
To unstow the config:
stow -D profile
-D/--deleteUnstow the config and deletes the symlinked file
To unstow the advanced structured config, even add a verbose flag:
stow --verbose=2 -D -t $HOME/.config alacritty
To stow/restow a config, used for pruning obsolete symlinks from the target tree:
stow -R alacritty
-R/--restowFirst unstow, then restow again
Show what stow command is doing:
stow -v alacritty
-v/--verboseShow output describing what stow is doing--verbose=[N]Verbosity levels are from 0 to 5, 0 is default
It could be very helpful to troubleshoot issues, especially with --verbose=2.
To show some useful stow commands:
stow -h
-h/--helpShow useful stow commands syntax
You can stow command directly from the $HOME.
stow -v -t $HOME/.config -d $HOME/Documents/git/mydots alacritty
-d DIR/--dir=DIRSet stow directory to “DIR” instead of default current directory I have run it from $HOME
 ~/, and it worked like a charm.
ln -s Symlinks
The ln command is used to create a link between files. The ln -s method has the following limitations compared to stow:
- Not beginner-friendly like
stowadvanced directory structure - The
lncommand cannot automatically take care of target parent directory creation. - The
ln -scommand by-default only accepts absolute paths$HOME/Documents/git/mydots/profile/.profileinstead of relative pathsprofile/.profileexcept when using-rflag. - If you have a lot of dotfiles, it might become cumbersome to manage them via
ln -s.
It’s a good idea of have each config file in its own directory, but not necessary for ln -s as it can symlink both files and directories.
The ln -s in Action
My directory structure looks like this:
 It shows a single directory for each single config file.
Let’s first link a file:
ln -s $(pwd)/profile/.profile ~/.profile
- Links the
.profileto the$HOME/.profile $(pwd)Captures and inserts the output ofpwd, which stands for prink working directory
- The
~/is same as$HOME/or/home/<username>/ - If you want, you can type the whole path
$HOME/.profileor/home/<username>/.profile
You can link the whole directory too:
ln -s $(pwd)/alacritty ~/.config
- The whole
alacrittydirectory gets linked to~/.config/alacritty
If the file already exists in the link location, you can override it:
ln -si $(pwd)/profile/.profile ~/.profile
-i/--interactiveprompt whether to remove the existing destination file.- Reply with
yto replace the existing files with the symlink
To remove existing file without any prompt:
ln -sf $(pwd)/profile/.profile ~/.profile
-f/--forceRemove existing destination files
Useful Commands
To show what the ln -s command doing:
ln -sv $(pwd)/profile/.profile ~/.profile
-v/--verbosePrint name of each linked file
Using relative paths instead of absolute paths:
ln -s -r profile/.profile ~/.profile
-rCreate links relative to link location- The
-ris always used with-s.
Backup the existing files:
ln -s -b $(pwd)/profile/.profile ~/.profile
-bBackups the existing file with suffix~, name of the backup filename will be.profile~.- The
-bdoesn’t except any argument
If you want to change the backup suffix:
ln -s -b --suffix=.bak $(pwd)/profile/.profile ~/.profile
--suffix=SUFFIX/-S SUFFIXmention your backup file name SUFFIX- New backup filename will be
.profile.bak.
You can write multiple commands in the combined form like this ln -svrb
To delete any dangling (broken, not linking anywhere) links:
symlinks -d /path/to/dangling/link/file
To check if a file links anywhere:
ls -l /path/to/file
To unlink:
rm /path/to/link/file
OR
unlink /path/to/link/file
Another method of managing dotfiles using git via bare git repo. The pro is you don’t need anything but only git itself. Check the References Section for step-by-step guide.
References
man stow— The Manual I usedman ln— My Manual of Choice- Stow Manual — The Official Detailed Manual
- ln Manual — The Official GNU
lnManual - dotfiles — An ArchWiki Guide
- My dotfiles repo — A mess but still do its job
- The ArchWiki — The Git bare Repo Guide