
Sleuthkit Apprentice Challenge is about doing forensic analysis of disk images and finding the useful and juicy information about the target.
Necessary Information1 Before Starting the Challenge
- Disk image is a huge dump of many numbers
- Those numbers have invisible structures
- Sleuthkit makes navigating those structures much easier
The four layers of disk images are:
1. media
mmlsis a media layer tool, gives partition table and key info for delving into other layers- Media is the lowest level, providing key information to access the deeper layers, but not shedding much light on the data contained in the image
2. Block
- 2nd lowest layer
- Block layer tools are prepended with
blkin the Sleuthkit. blkcatTool that outputs the contents of a single block.- The block layer is the number of the disk image broken into equal-sized chunks.
- A single file may contain multiple blocks.
3. Inode
- Bookkeeping layer, like a table of contents with chapter numbers being like the inodes, and the pages like the blocks of a file
- Inode layer tools are prepended with
i icatis a tool that outputs a single file based on its inode number
4. Filename
- The layer that the most users see and interact with
- Interacting with file layer is like a normal shell operation
- The tools are prepended with
f flsis a tool that lists the files on an image starting at the root
The Walkthrough
The Challenge2 require us to download the disk image, decompress, and then find the flag by looking at different layers of the .img.
Login to the WebShell
Login to the picoCTF WebShell or you can use your own VM. In my case, I will use the picoCTF WebShell.
Download the Challenge File
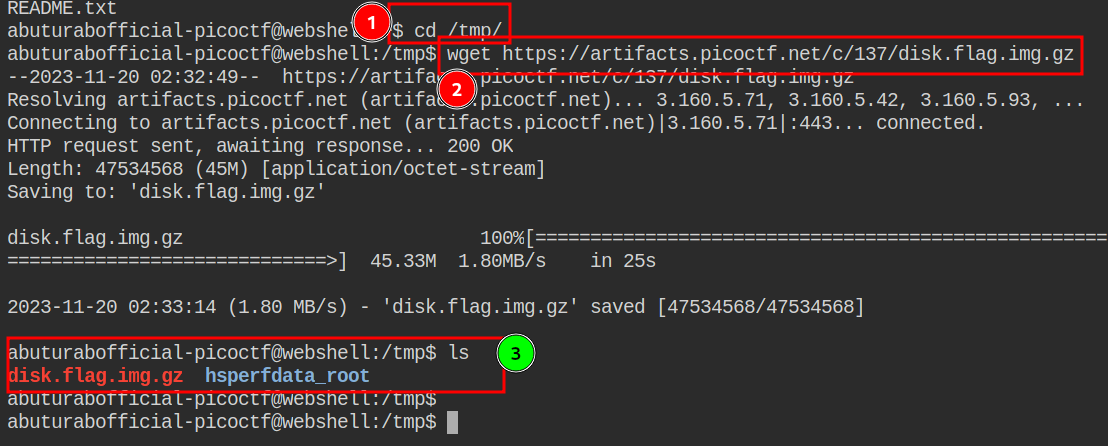
To keep your home directory clean, move into the /tmp DIR, and use wget command to download the given disk image.
Check if the .IMG file has been downloaded into your tmp DIR, use ls command which will list all the files (except hidden ones) in the DIR.
|
|
Decompress the File
As you have noted in the previous step, the downloaded file is a .gz compressed archive. To decompress it, we need a separate tool called gunzip which comes preinstalled on most of the Linux Systems.
|
|
After this, we will get uncompressed disk image disk.flag.img, the gunzip will automatically delete the uncompressed .gz file.

Using fls to List the Partition Content
We will use mmls tool, to see the partition tables, and find the OFFSET value.
|
|

As in the screenshot label#2 it looks like the largest partition, and it’s labeled as 0x83 for Linux, it’s a bit of a guess, but we can list its content by using the Start OFFSET value supplied into fls tool.
Lets to be sure, check the content of partition#003 by supplying the OFFSET value
|
|

As it throws error, we will move on to the next partition.
Now let’s check the contents of the largest partition #004:
|
|
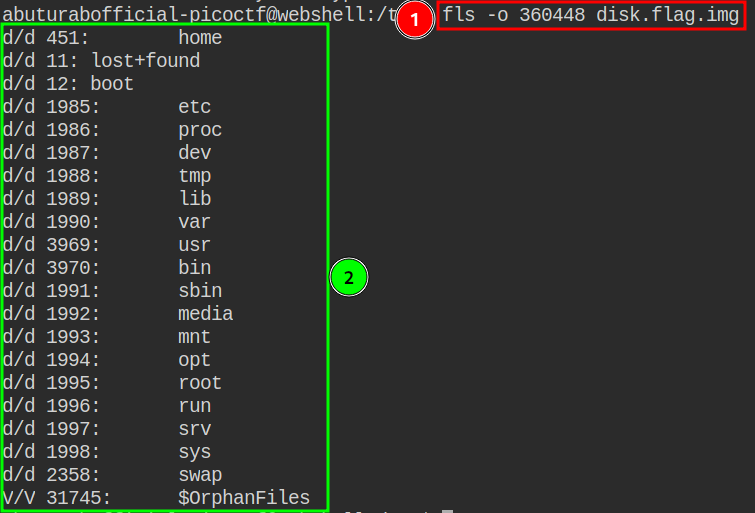
Now we will look at the contents of each dir, to do this we will again use the fls command.
First, we will look at the home directory:
|
|
The home dir seems to be empty, so we will move on.
Let’s look at the root dir:
|
|
We need to make smart decisions about which directory to look at first, to avoid wasting time. Please read about Linux directory structure to know more about which directory contains what.

There might be some juicy stuff in the root dir, so let’s investigate further. Lets look into myfolder:
|
|
I think, we got our flag:

We can see the flag.txt file in the my_folder dir. We need to look at the content of this file to find out our flag.
To see the contents of individual files, we will use the icat command, as fls can only list the dir content:
|
|
Voilà, we got our flag:
|
|

Paste the flag in the picoCTF flag box, and you’re done. Now take a deep breath and have a moment to enjoy your achievement.